
How to Clean Your Dryer Vent: A Step-by-Step Guide for Toronto Homeowners
- By Daniel Nahman
- May 7, 2025
Contents
If you’re a Toronto homeowner wondering how to clean your dryer vent properly and safely, you’re in the right place. Regular dryer vent cleaning is essential for preventing fires, improving efficiency, lowering energy bills, and extending the life of your dryer. This comprehensive guide will walk you through everything you need to know—from tools and techniques to when it’s time to call in the pros.
Why Dryer Vent Cleaning Matters
Lint is extremely flammable. Over time, it accumulates not just in your dryer’s lint trap but also within the vent system leading outside your home. If left unchecked, this buildup restricts airflow, forcing your dryer to work harder, which in turn increases utility costs and the risk of overheating and fire. According to the National Fire Protection Association, dryers cause thousands of house fires annually—many due to neglected vent cleaning.
Professional cleaning services like Stanley Steemer and local experts such as Pro Handy Solutions in Toronto stress the importance of at least annual dryer vent cleanings, especially in homes with large families or frequent laundry cycles.
Tools and Materials You’ll Need
Before you begin, gather the following items:
- Vacuum cleaner with a hose attachment
- Dryer vent cleaning brush kit (available at most hardware stores)
- Screwdriver
- Flashlight
- Safety gloves and dust mask
- Duct tape (optional, for sealing hoses)
Investing in a good dryer vent cleaning kit is highly recommended,
Step-by-Step Dryer Vent Cleaning Guide
1. Safety First
- Unplug the dryer. For gas dryers, shut off the gas supply.
- Wear gloves and a mask. Lint and dust can be irritating to skin and lungs.
This step ensures you’re not exposed to unnecessary electrical or respiratory hazards.
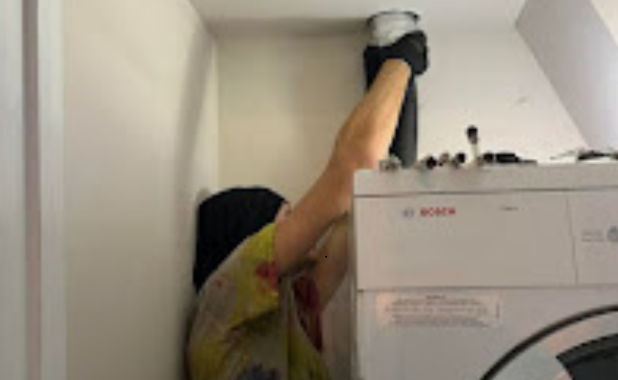
2. Access the Vent System
- Pull the dryer away from the wall—carefully.
- Use a screwdriver to loosen the clamp and detach the vent hose from the dryer.
- Shine a flashlight into the vent to inspect for lint buildup or blockages.
3. Clean the Vent Hose
- Insert your vacuum hose to suck out any loose lint from the hose.
- Use your vent brush to scrub the inside of the hose. Push it through in rotating motions and pull it back slowly to catch stubborn lint.
4. Clean the Wall Duct
- Insert your vacuum or vent brush into the wall duct that leads outside.
- Rotate and push the brush gently to dislodge lint stuck to the walls of the duct.
- Follow up with the vacuum again to remove anything the brush knocked loose.
This is a key step that people often overlook, and it’s where the most dangerous blockages tend to form.
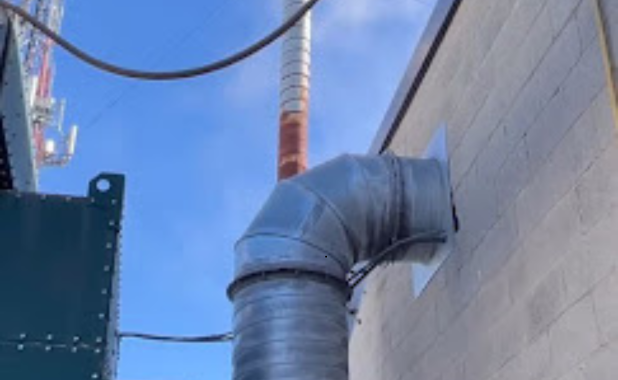
5. Clean the Exterior Vent
- Head outside to locate your exterior vent.
- Unscrew and remove the protective vent cover (if any).
- Use your hands (gloved) or the brush to clear out visible debris, leaves, or nests.
- Insert your vent brush inside and rotate it to clear the entire duct.
This step ensures that nothing is blocking the exit point of the dryer’s airflow, which is essential for proper function.
6. Reassemble and Test
- Reattach the vent hose to the dryer and secure it with the clamp.
- Push the dryer carefully back into position.
- Plug the dryer back in (or turn the gas back on), and run it on air-only or a short heat cycle to check for strong airflow.
Place your hand near the outside vent to confirm that air is flowing freely.
When to Call a Professional
While DIY dryer vent cleaning is manageable for many, it’s not always enough. If:
- Your vent runs long distances or has multiple turns
- You can’t access the entire duct
- You notice persistent issues like long drying times even after cleaning
it’s time to call in the pros.
Local Toronto Expert: Pro Handy Solutions
They specialize in dryer vent cleaning and offer trusted, efficient service across the GTA.
Phone: (647) 325-6554
Email: prohandysolutions.ca@gmail.com
Professional services typically include advanced tools, airflow testing, and cleaning both interior and exterior sections—like what Stanley Steemer describes in their commercial process.
Maintenance Tips for Year-Round Dryer Safety
- Clean the lint trap after every load.
- Inspect the vent visually every month—especially the exterior outlet.
- Schedule annual professional cleanings.
- Use metal dryer ducts instead of flexible plastic ones, which can sag and trap lint.
Regular upkeep can save you from costly repairs or worse—a preventable house fire.
Final Thoughts
Cleaning your dryer vent might not be the most glamorous task, but it’s one of the most important. For Toronto homeowners, where seasonal weather can increase dryer use, regular maintenance is key. By following this step-by-step guide or hiring trusted professionals like Pro Handy Solutions, you can protect your home, save on energy, and ensure your dryer runs efficiently for years to come

Daniel Nahman
Daniel is the CEO of Pro Handy Solutions. He is providing Professional Chimney and Dryer Vent Cleaning services in GTA for over 5 years.
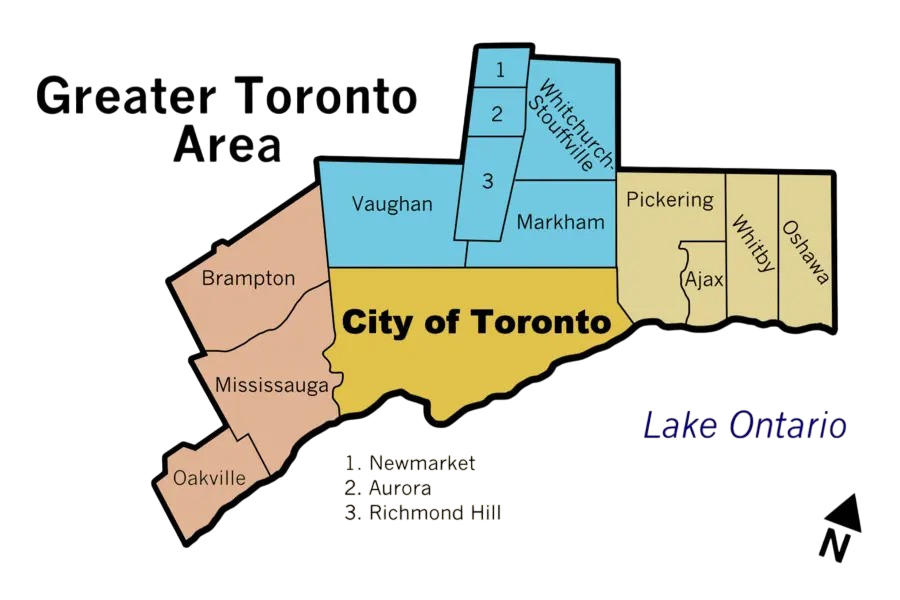
Chimney Cleaning & Repair Services Across the GTA
Pro Handy Solutions proudly serves homeowners and businesses across the Greater Toronto Area with expert chimney cleaning and repair services. Our team is dedicated to ensuring safety and efficiency in communities throughout the region, including Toronto, Mississauga, Brampton, Vaughan, and Markham. Whether you’re in the heart of downtown Toronto or the suburban neighborhoods of Richmond Hill, you can rely on us for professional, high-quality service. No matter where you are in the GTA, Pro Handy Solutions is here to keep your chimney in top condition.