
Contents
Chimney flashing is a crucial component in protecting your home from water damage. It forms a watertight seal between the chimney and the roof, preventing leaks and structural issues. When flashing fails, water can seep into your home, causing mold, rot, and costly repairs. Understanding how to inspect, repair, and maintain chimney flashing will help you avoid expensive damage and keep your roof in excellent condition.
What is Chimney Flashing?
Chimney flashing is a thin metal sheet installed at the joint between the chimney and the roof. Its primary function is to create a waterproof barrier that redirects water away from this vulnerable area. Properly installed flashing ensures that rain, snow, and melting ice do not seep into your roof structure.
Key Components of Chimney Flashing
There are three main components of chimney flashing, each playing a critical role in keeping your roof watertight:
- Step Flashing – Installed in layers with shingles, allowing water to flow off the roof safely and preventing leaks where the roof meets the chimney.
- Counter Flashing – Overlaps step flashing and is embedded into the chimney mortar, providing an additional layer of protection against moisture.
- Base Flashing – Placed at the bottom of the chimney, directing water away from the structure and preventing pooling
Common Signs of Chimney Flashing Damage
Flashing damage is not always obvious, but early detection can save you from extensive repairs. Here are some common indicators that your chimney flashing may need attention:
Interior Leaks: One of the most noticeable signs of failing flashing is water stains on the ceiling or walls near the chimney. If you see damp spots, bubbling paint, or mold growth, water is likely penetrating your roof structure.
Rust and Corrosion: Over time, exposure to moisture can cause flashing to rust or corrode. If you notice orange or brown discoloration on the metal, the integrity of the flashing has been compromised, making it less effective at keeping water out.
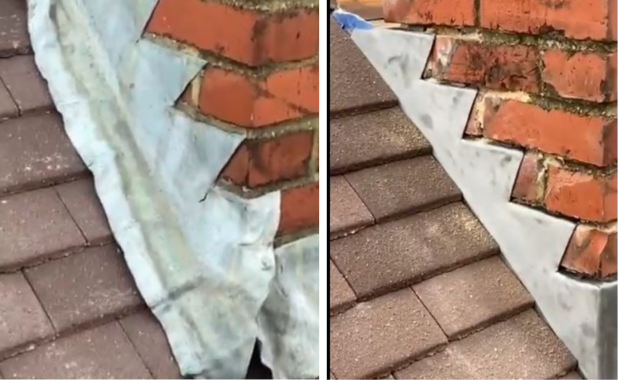
Cracks and Gaps: If the flashing is lifting, cracked, or separating from the chimney, it can no longer provide a watertight seal. These gaps allow moisture to seep into your roof, leading to rot and structural damage over time.
Causes of Chimney Flashing Deterioration
Chimney flashing does not last forever and can degrade due to several factors:
Weather Exposure: Flashing is constantly exposed to harsh weather conditions, including heavy rain, snow, and extreme temperatures. Over time, these elements cause metal flashing to expand, contract, and weaken.
Poor Installation: Incorrectly installed flashing may not create a proper seal, leaving small openings where water can enter. Poor workmanship or low-quality materials increase the risk of leaks and early failure.
Aging and Corrosion: Even with the best installation, flashing naturally wears out over time. Rust, weakened seals, and material fatigue are common issues in older flashing that require attention or replacement.
How to Inspect Chimney Flashing for Damage
Regular inspections can help you catch minor issues before they turn into expensive repairs. Here’s how to assess your chimney flashing:
Visual Inspection: Walk around your home and look for visible signs of rust, separation, or missing flashing pieces. Pay close attention to areas where the chimney meets the roof.
Attic Check: Examine the attic near the chimney for signs of leaks, such as damp insulation, mold growth, or water stains. These indicators suggest water is making its way through damaged flashing.
Water Test: On a dry day, use a hose to spray water around the chimney base. Have someone inside check for any leaks. If water appears inside, your flashing likely needs repair.
Step-by-Step Guide to Chimney Flashing Repair
Safety First
Working on a roof can be dangerous. Ensure you have a sturdy ladder, wear non-slip shoes, and consider using a safety harness. Always perform repairs on a dry day with good weather conditions.
Tools and Materials Needed
- Metal flashing (aluminum, copper, or galvanized steel)
- Roofing nails or screws
- High-quality roofing sealant
- Tin snips or metal shears
- Hammer and chisel
- Ladder and safety gear
Removing Old, Damaged Flashing
- Carefully use a chisel or pry bar to remove the existing flashing without damaging surrounding shingles or chimney mortar.
- Clean the area thoroughly, removing any debris, rust, or old sealant.
Installing New Chimney Flashing
- Install Base Flashing – Secure the base flashing at the bottom of the chimney, ensuring it extends slightly over the shingles for proper water runoff.
- Attach Step Flashing – Place step flashing in layers with each row of shingles, ensuring water flows correctly down the roof.
- Secure Counter Flashing – Embed the counter flashing into the chimney mortar joints and overlap it over the step flashing for a watertight seal.
Sealing and Waterproofing
Apply a high-quality roofing sealant around all flashing edges and joints to prevent water infiltration. Ensure all seams are completely covered.
Final Inspection and Leak Test
Once installed, perform another water test by spraying the area with a hose and checking for leaks. Inspect both the roof and attic for any signs of moisture.
DIY vs. Professional Repair – Which is Best?
When DIY is an Option: If you have experience with roofing repairs and the flashing damage is minimal, you may be able to handle a small repair yourself. Simple resealing or replacing a small section of flashing can be a manageable DIY project.
When to Hire a Professional: For major flashing issues, incorrect installation, or recurring leaks, hiring a professional services of Pro Handy Solutions is the best choice. Professionals ensure proper installation, use high-quality materials, and provide warranties for their work.
Preventative Maintenance and Long-Term Care
To extend the lifespan of your chimney flashing, follow these maintenance tips:
Regular Inspections: Check your flashing at least twice a year, especially after severe weather. Look for cracks, rust, or signs of wear.
Keep Gutters Clean: Clogged gutters cause water to accumulate around the chimney base, increasing the risk of leaks. Clean gutters regularly to direct water away from your roof.
Address Small Issues Early: If you notice minor gaps, loose flashing, or worn sealant, fix them immediately. Small repairs prevent bigger, costlier problems down the road.
When to Replace Chimney Flashing Instead of Repairing
Age of Flashing: If your flashing is over 20 years old, replacement is usually the best option. Older flashing materials degrade over time and may no longer provide adequate protection.
Extent of Damage: If flashing has severe rust, multiple gaps, or recurring leaks, replacement is the best long-term solution. Temporary repairs won’t provide lasting protection.
Roof Replacement Considerations: If you’re replacing your roof, it’s a good idea to install new flashing at the same time. This ensures a complete seal and prevents leaks in the future.
Final Thoughts
Chimney flashing is a critical component in protecting your home from water damage. Regular inspections and timely repairs ensure your roof remains leak-free and structurally sound. Whether you opt for DIY repairs or hire a professional, proactive maintenance will save you from costly repairs in the long run. If you suspect flashing failure, don’t wait—address the issue before it leads to more extensive problems.

Daniel Nahman
Daniel is the CEO of Pro Handy Solutions. He is providing Professional Chimney and Dryer Vent Cleaning services in GTA for over 5 years.
Chimney Cleaning & Repair Services Across the GTA
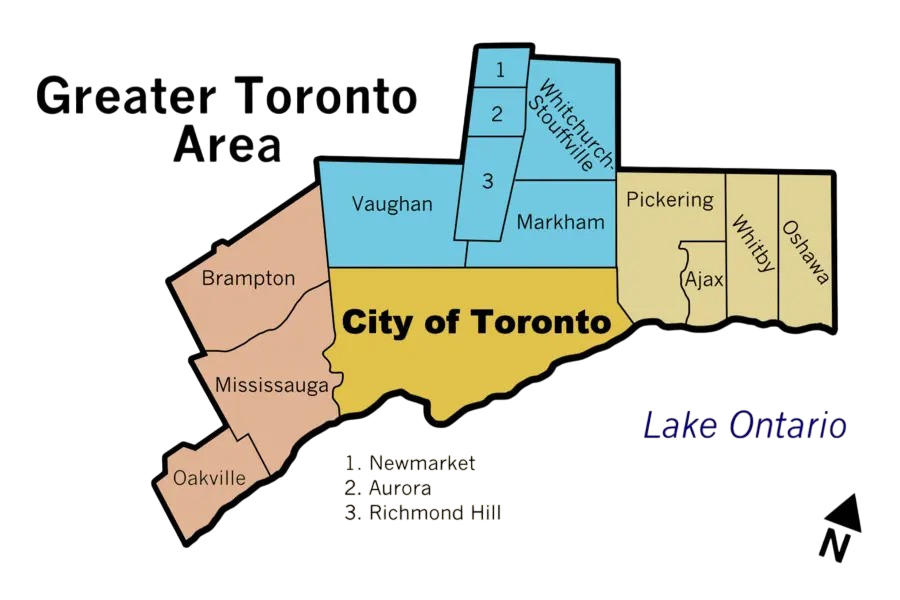
Pro Handy Solutions proudly serves homeowners and businesses across the Greater Toronto Area with expert chimney cleaning and repair services. Our team is dedicated to ensuring safety and efficiency in communities throughout the region, including Toronto, Mississauga, Brampton, Vaughan, and Markham. Whether you’re in the heart of downtown Toronto or the suburban neighborhoods of Richmond Hill, you can rely on us for professional, high-quality service. No matter where you are in the GTA, Pro Handy Solutions is here to keep your chimney in top condition.
Pro Handy Solutions proudly serves homeowners and businesses across the Greater Toronto Area with expert chimney cleaning and repair services. Our team is dedicated to ensuring safety and efficiency in communities throughout the region, including Toronto, Mississauga, Brampton, Vaughan, and Markham. Whether you’re in the heart of downtown Toronto or the suburban neighborhoods of Richmond Hill, you can rely on us for professional, high-quality service. No matter where you are in the GTA, Pro Handy Solutions is here to keep your chimney in top condition.